The Silk Thread of Gorindo - Ottawa - Canada
- Gorindo Meditation Technique - Part 1
- The Responsibility of Being a Martial Artist - Part 1
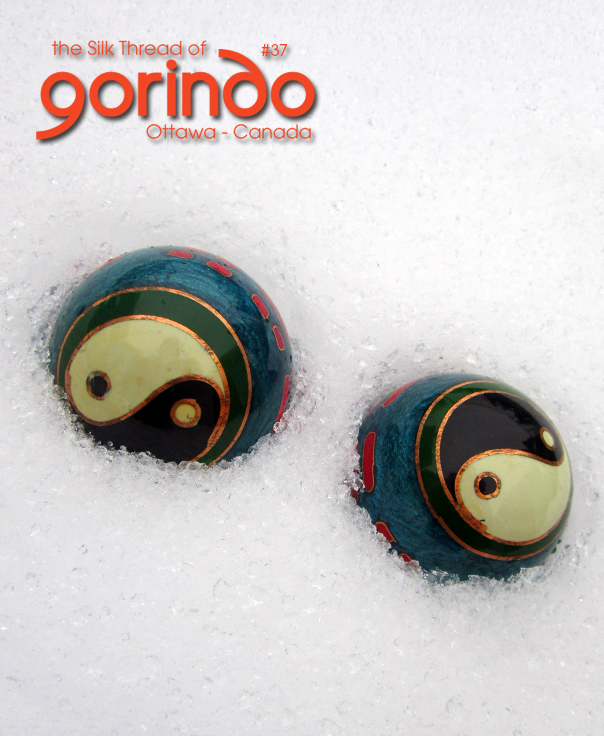
Cover Photo 'In-Yo in the Snow' by ©2013 Claudio Iedwab
Gorindo Meditation Technique - Part 1

Many schools apply different direct techniques of meditation, although the purpose and result may be the same. The process described here is how we proceed in our school; we do not presume it to be the only correct way. We present it here as an illustration, and students of other disciplines will wish to adopt their own methods. The description begins with basic technique, and when you have accomplished that comfortably with practice, you can incorpora te the more advanced approaches. For some people this process can take a long time, for others, it will take less. It does not matter. With dedication and a relaxed attitude, it will cocome. Let it happen naturally.
Place
Begin by finding a quiet room, a place in nature, or a spot in athe dojo.
Time
Medidtate at the beginning and end of practice or at sunrise and sunset.
Position
You can do this technique in seiza, sitting on a chair with the back straight, or lying down.
Breathing
Throughout the following description, breathing will proceed slowly and regularly. The inhalation and exhalation occur through the nose with the mouth closed. Exhale slowly and completely without forcing the air or going to the point where the urgent need to inhale occurs. Pause briefly. Allow yourself to inhale with the abdomen expanding gently downward and outward. Again the inhalation is relaxed and not so full as to create tension or allow the chest or shoulders to rise. The inhalation should feel like a refreshing of the system, the exhalation like a release of tension. The exhalation ideally should be longer or slower than the inhalation.
The Process
1. Description of seiza position
From a standing position, lower the left knee to the floor. Keeping the spine straight, bring the right knee down so you are in the kneeling position. Form a triangular base by bringing the feet together with the insteps flat on the floor a nd keeping the knees two fists apart. Traditionally the left big toe rests across the right one. Tuck the buttocks under so you are sitting on your heels with the pelvis directed up and forward, ensuring the natural slight curvature of the lower spine.
Position the head on top of the spine as if suspended from a string. Imagine the nose, throat, solar plexus, and hara in one vertical line. Tuck the chin in slightly so that the ears, shoulders, and hips are in one plane.
Place your right hand palm up in the center of your lap, close to your body. Lay the left hand on top of the right with fingers overlapping, opposite, and forming parallel line. For accurate placement, ensure that the fingertips of the index and central fingers of the right hand lie directly underneath and touching the large knuckles of the index and center fingers of the left hand. Bring thumbs together lightly with only the tips of the thumbs touching, not the whole thumbprint. The Zen teachers would describe this as forming "neither mountain, nor valley."
2. Closing the eyes
Initially, and for some time, the eyes remain closed to avoid visual distraction. Much later in studying meditation you can open them slightly. Eventually, when presented with the opportunity, you can keep your eyes open in a beautiful natural environment.
Once you close your eyes, you can check your position by rocking slightly for ward and backward, then moving gently left to right until, like a balance scale, you come to rest quietly, aligned and in the center.
Relax the tongue and position the tip of it up and behind the top teeth. Continue to breathe in a slow, relaxed manner and begin to focus on exhaling the air.
3. Self-examination
With each exhalation begin to scan the muscles of the face, forehead, and top and back of the head to free any tension there. Continue to expand your awareness to include the other areas of the body, from the top down and the inside out. Proceed through the neck, throat, shoulders, chest, arms, forearms, writs, hands, back (upper, middle, and lower), abdomen, groin, buttocks, thighs, knees, calves, ankles, geet, and toes.
Feel the skin over your whole body free of tension and refreshed. Then visualize the internal organs of the abdomen released of tension. By this time you will be aware of the beating of the heart and the pumping of the cardiovascular system forming a pulse through the body that sends nutrients to every cell.
See your lungs filling with oxygen that also fills every cell. Exhale calmly and slowly, allowing the pathways of the nervous system to share in the calming effect.
Once this harmonization of the whole system has occurred, your consciousness can expand beyond yourself and your physical container in a peaceful, universal experience.
\/Vhen you wish to resume activity, take three deep breaths, slowly raise your hands in front of you, palms up, and stretch them in a large circle to the to the outside, returning to the abdomen. Open your eyes, bend forward, and place your hands on the floor. Raise the hips slowly, then put your toes and balls of the feet on the ground, gently shifting the weight to your feet. Flex toes, ankles, and knees, bringing your hands back close to your knees. Opening your feet shoulder-width apart, slowly straighten your legs, unroll your spinal vertebra, and resume a standing position, raising the head and finally the eyes. It is most important to not stand too quickly because loss of balance could easily result.
(to be continued)
Excerpt from “Martial Arts Mind & Body” by Claudio Iedwab & Roxanne Standefer. See their e-books available at askSensei.com >>
Photo 'Roxanne's Nature Meditation" by ©Claudio Iedwab
- Gorindo Meditation Technique - Part 1
- The Responsibility of Being a Martial Artist - Part 1
« Click the Subscribe link on the left
